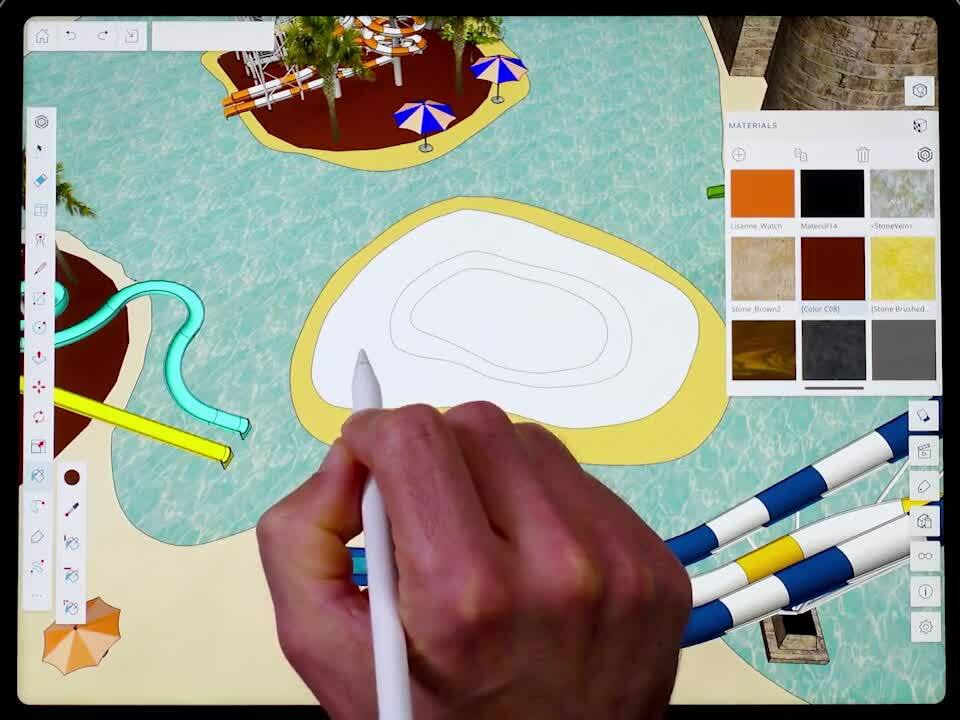
The Paint Bucket tool (![]() ) helps bring your models to life using colors and simulated textures. Suddenly, that blank circle becomes a lush, green front lawn. Or that empty rectangle transforms into a thatched roof.
) helps bring your models to life using colors and simulated textures. Suddenly, that blank circle becomes a lush, green front lawn. Or that empty rectangle transforms into a thatched roof.
The Paint Bucket tool works with the Materials panel <icon>. When you choose the paint tool along with any optional tool modes, the Materials panel opens allowing you to choose the color or texture you would like to add to your model.

In SketchUp for iPad, the Paint Bucket tool has the following optional tool modes:
- Sample (
 ) - Applies a material to only one specific piece of geometry.
 - Object Faces (
 ) - Applies a material to all faces in your selection.
 - Connected Faces (
 ) - Applies a material to your selection and all connected faces.
 - All Faces (
 ) - Applies a material to all faces in your selected object, even those that aren't connected.
You'll also see a circle icon (![]() ) representing which material you've selected.
) representing which material you've selected.
iPad Input Methods for the Paint Bucket Tool
After choosing the Paint Bucket tool and activating any optional tool modes, you can use your preferred iPad input method in either Click-Move-Click or Just Draw mode.
All Input Methods - Select a material from the Materials panel and either tap or click to apply that material to your geometry.

The Materials Panel
The Materials panel (![]() ) provides several predefined colors and textures.
) provides several predefined colors and textures.

As seen in the image above, there are a few options at the top of the panel:
- Edit - Opens the Edit material Details interface, allowing you to rename the material, edit colors, add or edit textures, or adjust the opacity.

- Copy - Copies and opens the Edit Material Details interface for that copy.
- Discard - Removes the selected material.
- 3D Warehouse - Opens the 3D Warehouse Materials page. When you download materials from 3D Warehouse, those materials are automatically added to your Materials panel.
For more tips and a deeper dive into using the Paint Bucket tool and Materials in your model, see Adding Colors and Textures with Materials.
